Hello Everyone, Now I have shared a Basic knowledge of how to setup Grandstream UCM IP PBX server, basically A powerful yet easy to manage voice, video, data, and mobility communications platform has never been more achievable than when anchored with Grandstream’s series of UCM IPPBXs. The UCM series of IP PBXs offer an extensive set of unified communication features in an easy-to-manage on-premise solution with no licensing fees, upgrade fees, or costs per feature. Our UCMs range from small and medium business deployments to small and medium enterprise solutions.
Grandstream has 3 IP PBX series. UCM6300 Series IP PBX, UCM6300 Audio Series IP PBX, UCM6200 Series and UCM6510. Each model has different user capacity and storage but the web GUI configuration is the same. Anyway, this post will show you how to setup the UCM IP PBX Server, let’s get started
Setup 1: Getting Started with the Web GUI
Connect an Ethernet cable to the WAN port of UCM63XX/UCM63XXA/UCM2XX
Gather the IP address from the display of Grandstream UCM6XXX provided by DHCP pool of any
network.
Type https://IP_Address:8089 in any browser. [note: The UCM and the computer should be on the same network]
Example: https://192.168.1.1:8089
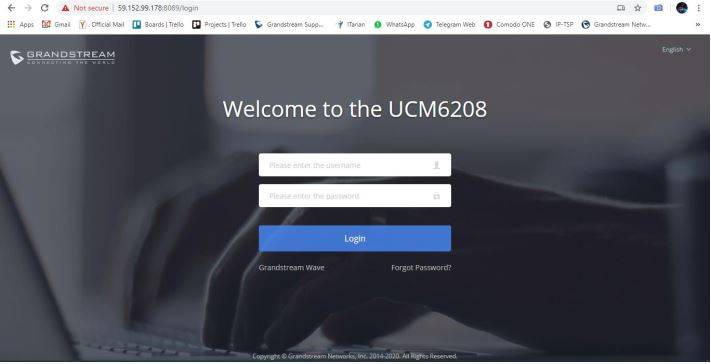
User Name: admin
Password: Provide the password from the back end of the UCM
Hit Login. You will be on the Web Console of UCM6XXX.
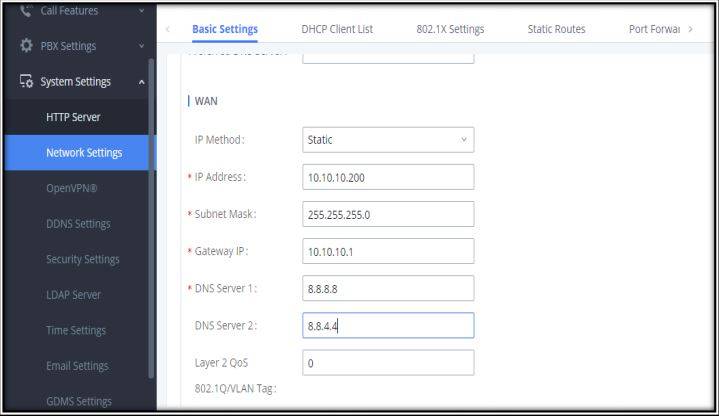
Setup 2: Network Configuration of the UCM6XXX IP PBX
We must configure the UCM6XXX network by Static IP address.
Go to System Setting → Network Setting → WAN Setting
Define the following component here.
IP Method: Static
IP Address: 10.10.10.200 (In our Case)
Subnet Mask: 255.255.255.0 (In our Case)
Gateway: 10.10.10.1 (In our Case)
DNS1: 8.8.8.8 (In our Case)
DNS2: 8.8.4.4 (In our Case)
Setup 3: Creating new SIP Extension (Single/Batch)
Creating Single Extension:
To manually create new SIP user, go to Web GUI → Extension/ Trunk → Extensions. Click on “Add” and
a new dialog window will allow users to fill in the extension information.
The information is as follows-
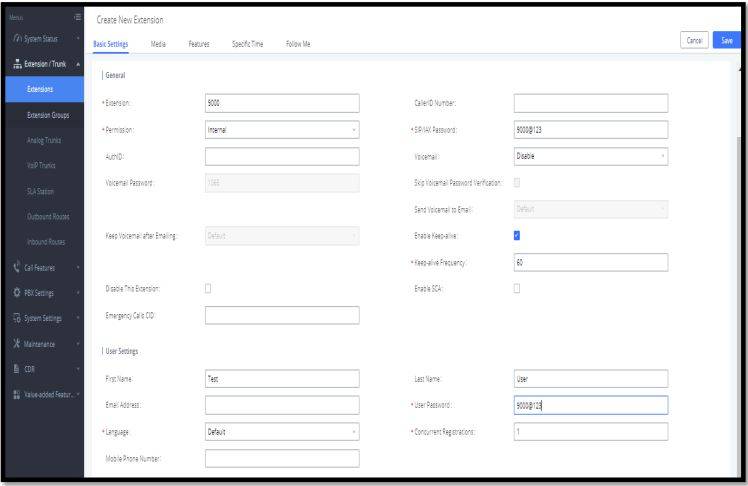
Extension: Define the required extension here (9000 in our case)
SIP/IAX Password: Define the SIP password here (9000@123 in our case)
Voice Mail: Devine the voice mail status here (Disable in our case)
Enable Keep me alive: Should be enabled
User Name: Define User’s First name & Last name here (Test User in our case)
User Password: Define user password here (9000@123 in our case)
Press Save then Press Apply Chang
Creating Batch Extension:
To manually create new SIP user, go to Web GUI → Extension/ Trunk → Extensions. Click on “Add” and
a new dialog window will show for users to fill in the extension information
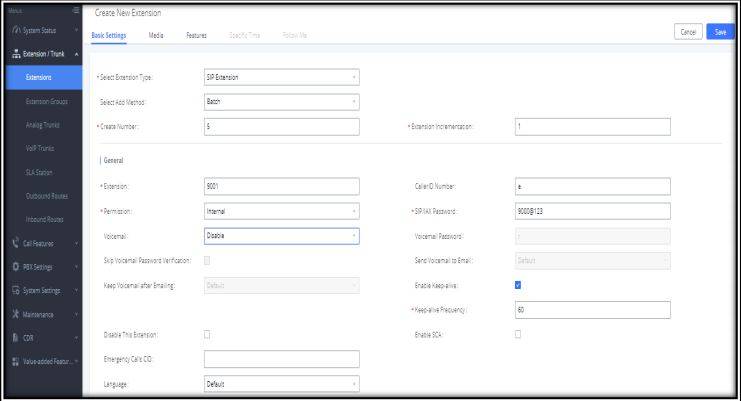
We opted to create 5 extensions in a batch in this figure. We opted to create 5 extensions in a batch in this figure.
Select Add Method: Batch
Extension: Define the required extension here (9001 in our case)
Extension Increment: Define the extension increment here (In our case this is set to 1)
SIP/IAX Password: Define the SIP password here (9000@123 in our case)
Voice Mail: Devine the voice mail status here (Disable in our case)
Enable Keep me alive: Should be enabled
Press Save then Press Apply Change.
Extensions 9001-9005 will be created in this procedure.
Setup 4: Creating VoIP Trunk
Configuration:
Below steps to configure SIP Trunk on UCM6XXX
1. Access UCM6xxx web GUI → Extension / Trunk → VoIP Trunks.
2. Click on Add SIP Trunk.
3. Select Registered SIP Trunk in the Type section.
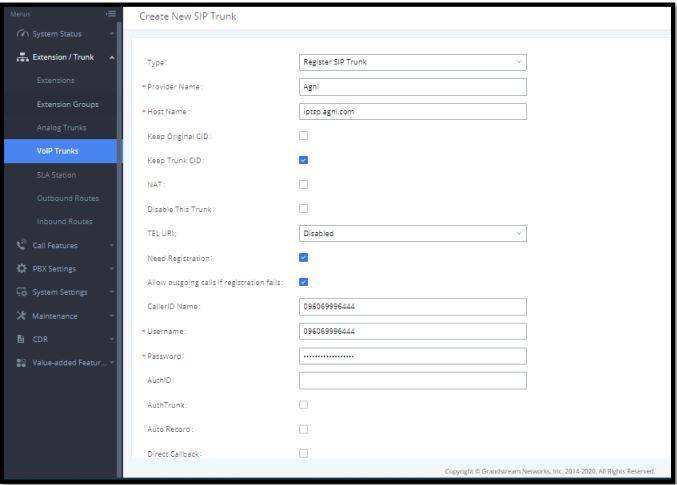
Provider Name: Give the provider name of the Registered Trunk (Agni in our case)
Host Name: Give the hostname provided by IP/TSP (iptsp.agni.com in our case)
Caller ID Name: Define the caller ID name here (096069996444 in our case)
Username: Provide the Username here (096069996444 in our case)
Password: Provide the password for the trunk given by the IP/TSP
Hit the Save button then Hit Apply Change button
Setup 5: Creating Inbound Routes
Create Outbound Routes
1. Go to Web UI → Extension/Trunk → Inbound Routes.
2. Click on “Add” button to create a new Inbound route.
Trunk: Select the VoIP Trunk here
Pattern: Define The pattern Here. Standard Pattern is “X.” & “+88X.”
Default Destination: Select your Default destination here (In our case Extension 1000 is provided)
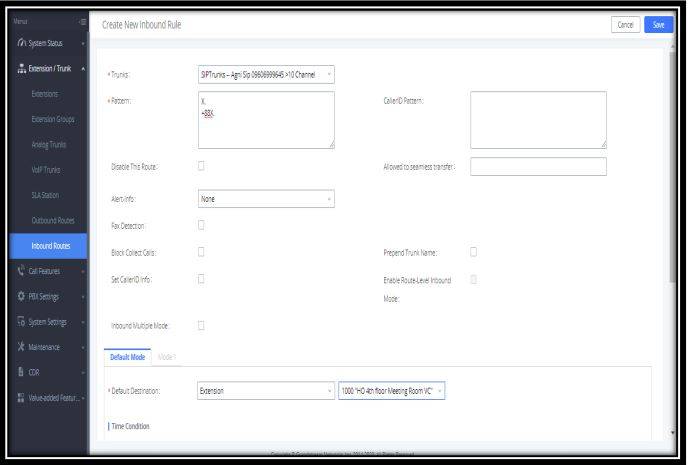
Press Save Then Press Apply Changes.
This will define the Inbound route for the UCM
Step 6: Creating Grandstream UCM Outbound Routes
Create Outbound Routes
1. Go to Web UI → Extension/Trunk → Outbound Routes.
2. Click on “Add” button to create a new Inbound route.
Calling Rule Name: Define the Calling rule name here (In our case Outgoing is the Name)
Trunk: Select the VoIP Trunk here by which call will be going out
Pattern: Define The pattern Here. Standard Pattern is “X.” & “+88X.”
Privilege Level: Select your Privilege Level Here (In our case Extension Internal is provided)
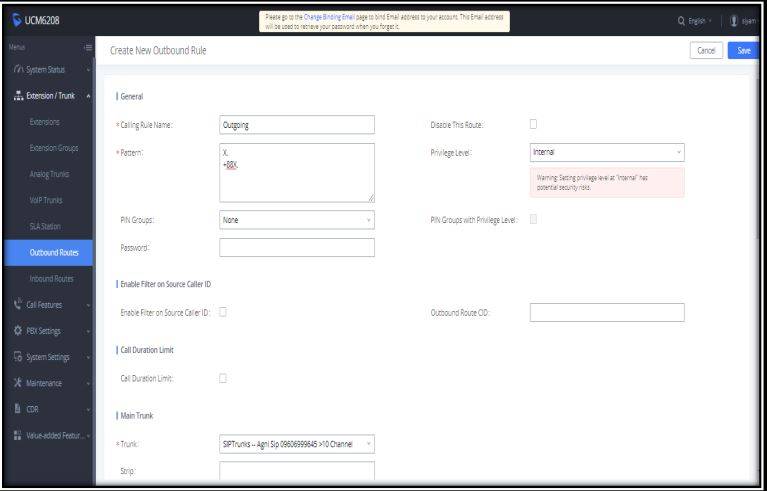
Press Save Then Press Apply Changes.
This will define the Outbound route for the UCM
These are the basic configuration for Grandstream UCM62XX for enabling internal and external calling features. Click if you want to know how to setup Grandstream IP Phone.


No Comments